 It seems like Microsoft loves to rip people off. For a wireless adaptor, they are welling to charge $100- while every other console on the market has Wifi. And worst, the best adaptors in the market are only $50.
If you use a Macbook, here a great way to connect to xbox live without wasting hard-earned money.
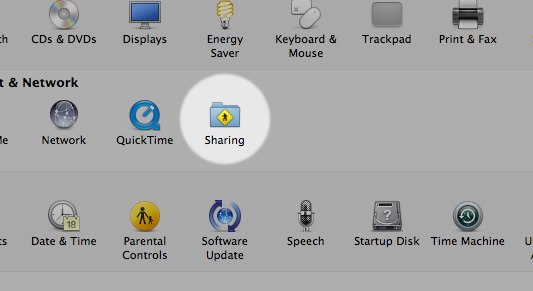
First, go to sharing in your system preferences.

Once in, go to the internet sharing menu. Don’t check it yet- just select “Airport” as where you want to share your connection from, and thick “Ethernet” as shown below. Now, you can check the box next to Internet Sharing.

Now, back out into the menu and go to the network menu (image is shown).
Click “Ethernet” and choose to configure it manually. Choose 10.0.0.1 as the IP address and 255.255.255.0 as your subnet mask.
Right, now turn on your xbox.

Head to the network preferences on the xbox. (My Xbox-> System settings-> Network Settings)
You should see this.
Use the following numbers as your IP Address, Subnet Mask and Gateway.
IP Adress- 10.0.0.2
Subnet Mask- 255.255.255.0
Gateway- 10.0.0.1

For the Primary DNS server, go back to Mac’s system preferences and enter the “Network” tab.
Make sure you selected “Airport” on the left sidebar, then click “Advanced”
This screen will come out. Now go to “DNS” on the Navigation bar and take note of your DNS server (In my case, 192.168.1.254). Use that as your “Primary DNS server” on your xbox (refer to above screenshot)
For “Secondary DNS Server”, use your IP address. You can check your IP Address on http://www.whatismyip.com/.
Plug in your Xbox to your Mac via a ethernet cable, and it should work.
Please note that your NAT type is moderate, and it will be a little laggy. If you want the best connection, you should use a Ethernet cable straight to your router.
If you’ve any queries you’d like to ask me or encounter any problems, feel free to contact me at @stupidpower on twitter and via email.